
How To Make A Faberge Egg

Alright, gather 'round, folks. Today, we're going to embark on a journey that's as egg-citing as it is egg-ceptional. We're talking about crafting our very own Fabergé egg. Now, don't go thinking you need to be a Tsar or have a royal budget to pull this off. We're keeping it real, and by real, I mean, we're not using actual gold or precious gems. Sorry to disappoint, but we're not magicians (though, if you are one, please invite me to your next trick show).
First things first: What's the deal with Fabergé eggs?
Fabergé eggs are those fancy, shiny, egg-shaped objects that the Russian Tsars gave to their queens as Easter gifts. They're like the original Easter eggs, but instead of chocolate and Cadbury creme, they're filled with surprises like mini portraits or tiny, intricate scenes. Carl Fabergé, the mastermind behind these egg-stravagant creations, made around 50 of these bad boys between 1885 and 1917. And no, they didn't come with a free chocolate bar on the side.
Now, let's get our hands dirty (or egg-y, rather).
First, you'll need some supplies. We're talking egg-shaped hollow forms, which you can find at craft stores or online. Don't go trying to hollow out a real egg – trust me, it's a mess. Next up, you'll need some gold leaf (the craft store kind, not the edible kind), gemstones (again, the craft store kind), and a whole lot of patience. Oh, and some glue, paintbrushes, and a few other tools. But let's not get ahead of ourselves.
Must Read
Step 1: The Shell Game
Start by painting your egg-shaped form with a base color. I suggest something neutral, like white or beige. It's like painting your nails before applying nail art – you need a solid base. Let it dry. Then, apply a layer of adhesive size – this helps the gold leaf stick. Let that dry too. You're basically playing the world's most boring game of wait-and-watch.
Step 2: Gold Rush
Now comes the fun part: applying the gold leaf. It's like giving your egg a fancy, shiny makeover. But be gentle, folks. Gold leaf is as delicate as a royal's ego. Start from the top and work your way down, using a soft brush to smooth out any wrinkles. It's like wrapping a present, but instead of paper, you're using liquid gold.
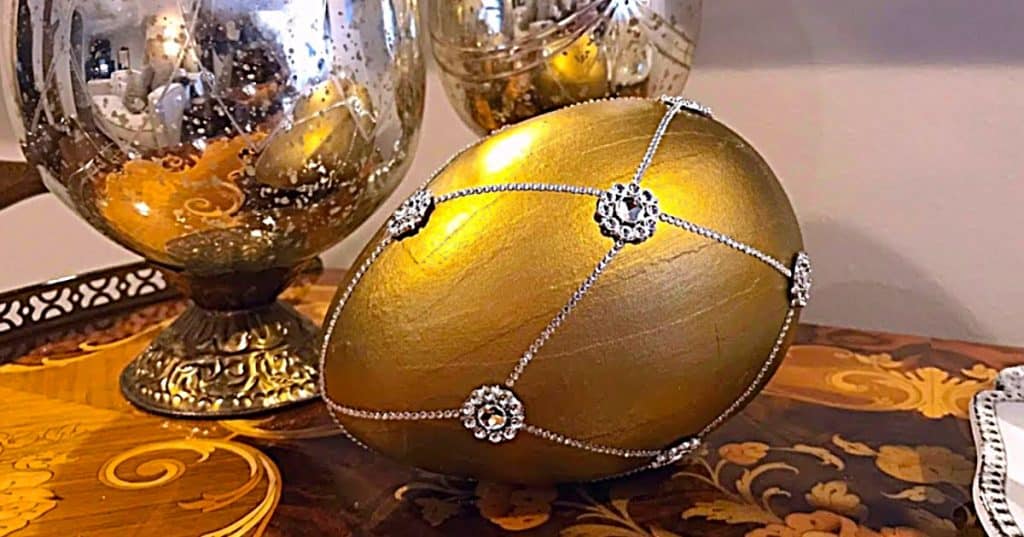
Once you've covered your egg, let it dry. Then, use a soft cloth to buff it. You'll be left with a shiny, golden egg that looks like it's straight out of a Fabergé museum. Well, almost.
Step 3: The Jewel Thief
Now it's time to add those gemstones. You can glue them on directly, or create a design on paper first, like a blueprint for your egg's bling. Remember, less is more. You don't want your egg looking like a disco ball gone wrong.
Once you're happy with your design, glue the stones in place. Let it dry. Then, apply a layer of varnish to protect your masterpiece. It's like giving your egg a shiny, protective coat – think of it as sunscreen for your golden gem.
Step 4: The Big Reveal
Finally, it's time to add the surprise inside. This could be anything – a tiny portrait, a mini scene, or even a little note. Remember, the point of a Fabergé egg is the surprise inside. So, make it good.

Once you've added your surprise, seal the egg shut. You can do this with glue or by drilling a small hole and filling it with wax. And there you have it – your very own Fabergé egg. Well, a craft store version of one, anyway.
Egg-xtra Tips
Here are a few tips to make your egg-venture a success:
- Practice makes perfect – Don't expect your first egg to be a masterpiece. Keep trying, and you'll get better.
- Less is more – When it comes to gemstones, remember that a little goes a long way.
- Be patient – Crafting a Fabergé egg takes time. Don't rush, or you'll end up with a hot mess (and not the good kind).
And there you have it, folks. Your very own Fabergé egg. It might not be worth a fortune, but it's worth the time and effort you put into it. Plus, it's a great conversation starter. Just don't expect it to hatch anything but a few laughs.